Introduction:
Understanding How to Tune a Violin Correctly
Learning how to tune a violin is one of the most important foundational skills for every violin player. Whether you are holding a violin for the first time, returning to the instrument after a long break, or preparing for a rehearsal or performance, correct tuning has a direct impact on the quality of your sound. Even excellent technique cannot produce a satisfying musical result if the strings are out of tune. For this reason, developing a reliable tuning routine should be part of every violinist’s regular practice.
A standard violin has four strings: G, D, A, and E. From the lowest-pitched string to the highest, these strings are tuned to G3, D4, A4, and E5. The strings are arranged in perfect fifths, giving the violin its characteristic tonal range and allowing players to move naturally across melodies, scales, and harmonies. When one or more strings drift away from their correct pitch, notes may sound sharp, flat, unstable, or unpleasant. This can also make it harder for beginners to develop accurate listening skills and proper intonation.
Understanding how to tune a violin involves more than simply turning a peg until a note sounds approximately correct. Violinists need to know how to identify each string, compare pitch accurately, use tuning pegs safely, adjust fine tuners carefully, and avoid placing unnecessary tension on the strings or instrument. Beginners often make the mistake of turning pegs too quickly, which may cause a string to become excessively tight or even break. Slow, controlled adjustments are always the safer approach.
Modern players have several convenient tuning options. A clip-on electronic tuner can detect string vibrations, while a smartphone tuning app can provide visual pitch guidance. Traditional methods include tuning to a piano, tuning fork, pitch reference, or another instrument. More experienced violinists may tune the A string first and then adjust the remaining strings by listening to perfect fifths.
Environmental conditions also influence tuning stability. Changes in temperature and humidity can affect strings, pegs, and wooden components. A violin that was perfectly tuned yesterday may require adjustment today, particularly after transportation or storage. New strings also stretch during their early use and often need frequent retuning.
Mastering how to tune a violin helps create a cleaner sound, supports better ear training, and makes every practice session more productive. With patience, suitable tools, and a consistent method, tuning gradually becomes a natural part of playing the instrument.
Know the Correct Notes of the Four Violin Strings
Before adjusting anything, you need to know the standard pitches. The four violin strings are tuned as follows:
- G string: G3
- D string: D4
- A string: A4
- E string: E5
The G string is the thickest and lowest-pitched string, while the E string is the thinnest and highest-pitched. When learning how to tune a violin, memorize this sequence: G–D–A–E.
Many tuning references use A4 = 440 Hz as the standard pitch. This is widely used for individual practice, lessons, and many ensemble settings. However, orchestras or specialized musical groups may occasionally use a slightly different reference pitch.
Choose the Right Violin Tuning Method
There is no single tuning method that suits every player. Beginners often benefit from electronic guidance because it provides immediate visual feedback.
Use a Chromatic Electronic Tuner
A chromatic tuner listens to the pitch and indicates whether the note is:
- Flat, meaning too low
- Sharp, meaning too high
- In tune, meaning correctly centered
Play one open string at a time and watch the display. Make small adjustments until the tuner shows the intended note at the correct pitch.
Tune with a Smartphone App
A violin tuning app is convenient for home practice. Place your phone nearby in a reasonably quiet room and play each open string separately. The app detects the pitch and shows whether adjustment is necessary.
Background noise can affect accuracy, so avoid tuning near loud conversations, televisions, fans, or other instruments.
Tune by Ear
Advanced players often tune the A string to a reference pitch and then tune D, G, and E by listening to perfect fifths. This method develops strong aural awareness but can be difficult for beginners who have not yet learned to recognize subtle pitch differences.
Start with the A String
A practical method for how to tune a violin is to begin with the A string. In standard tuning, A4 is commonly set at 440 Hz. Play the open A string and compare it with your tuner or reference tone.
If the pitch is slightly incorrect, use the fine tuner. If it is significantly too low or too high, the peg may require adjustment. Always move slowly. Large, sudden changes can create excessive tension.
Once the A string is stable, continue with D, G, and E. Recheck all four strings after the first tuning round because changing one string can sometimes slightly influence overall tension.
Understand When to Use Fine Tuners
Fine tuners are ideal for small pitch corrections. Many beginner violins have four fine tuners, while some advanced setups may have only one fine tuner on the E string.
To adjust pitch:
- Turn the fine tuner clockwise to raise the pitch
- Turn it counterclockwise to lower the pitch
- Make small movements rather than large rotations
- Play the string again after each adjustment
Fine tuners provide controlled precision and are generally easier for beginners to manage.
Use the Tuning Pegs Carefully
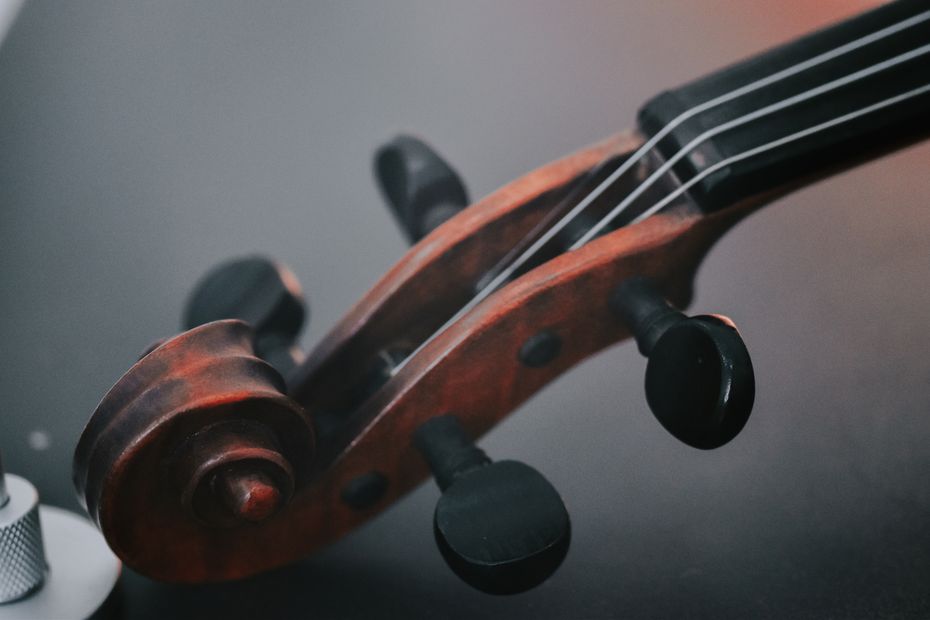
The pegs are designed for larger pitch adjustments. They require more care because even a small peg movement can significantly change string tension.
When using a peg:
- Pluck or bow the open string.
- Check whether the pitch is sharp or flat.
- Turn the peg very slightly.
- Apply gentle inward pressure so the peg remains secure.
- Check the pitch again before making another adjustment.
A common beginner mistake is turning the peg too far. If you are unsure, approach the target pitch gradually from below rather than tightening aggressively.
Follow a Safe Step-by-Step Tuning Routine
A consistent routine makes how to tune a violin easier and safer. Begin in a quiet environment and place the violin securely in playing position.
First, check each open string with a tuner. Identify which strings are significantly out of tune and which need only minor correction. Use pegs for larger changes and fine tuners for precise finishing adjustments.
A useful sequence is:
- Tune the A string.
- Adjust the D string.
- Tune the G string.
- Finish with the E string.
- Recheck all four strings.
Do not assume that a string remains perfectly tuned after adjusting the others. A final check improves accuracy.
Avoid Common Violin Tuning Mistakes
Beginners can protect their strings and instruments by avoiding several common errors.
Turning Pegs Too Quickly
Rapid peg movement can increase tension suddenly and may cause string breakage. Always make controlled adjustments.
Tuning the Wrong String
Before turning a peg, trace the string visually to confirm that you have selected the correct peg.
Ignoring Sharp Pitch
If a string is already too high, tightening it further increases unnecessary tension. Check your tuner before making an adjustment.
Depending Only on Visual Feedback
Electronic tuners are helpful, but players should also listen carefully. Over time, combining visual guidance with active listening develops stronger musical awareness.
Forgetting to Recheck the Strings
After tuning all four strings, play them again. Minor changes in tension may affect previously adjusted strings.
Keep Your Violin in Tune for Longer
Knowing how to tune a violin also involves understanding tuning stability. Store the instrument in a protective case and avoid sudden temperature changes. Excessive heat, cold, dryness, or humidity may affect the instrument and pegs.
New strings require special attention because they stretch after installation. Frequent tuning during the first several practice sessions is normal. Once the strings settle, they generally become more stable.
Check tuning before every practice session, lesson, rehearsal, or performance. This simple habit helps ensure consistent sound and supports accurate intonation.
Frequently Asked Questions About Violin Tuning
1. What are the correct notes for tuning a violin?
A standard violin is tuned to G3, D4, A4, and E5, moving from the lowest string to the highest. These strings are separated by intervals of a perfect fifth.
2. How often should I tune my violin?
You should check the tuning before every practice session, lesson, rehearsal, and performance. Temperature changes, humidity, transportation, and string stretching can all cause the pitch to shift.
3. Should beginners use pegs or fine tuners?
Beginners should generally use fine tuners for small corrections because they provide greater control. Pegs are appropriate when a string is significantly out of tune, but they should be adjusted carefully.
4. Why does my violin keep going out of tune?
Common reasons include new strings stretching, slipping pegs, changes in humidity, temperature fluctuations, improper string installation, or worn components. Persistent problems may require professional inspection.
5. Can I tune a violin with a phone?
Yes. A reliable chromatic tuning app can help identify whether each string is sharp, flat, or correctly tuned. For better results, tune in a quiet environment and play one open string at a time.
Conclusion: Build Confidence Through Accurate Violin Tuning
Learning how to tune a violin is an essential step toward becoming a more confident and independent musician. Correct tuning improves tone quality, supports accurate intonation, strengthens listening skills, and makes practice more enjoyable. By understanding the standard G–D–A–E string pitches and learning when to use fine tuners or pegs, players can develop a safe and dependable tuning routine.
Beginners should focus on small, controlled adjustments rather than rushing to reach the correct pitch. Electronic tuners and smartphone apps can provide valuable guidance, while ear-based tuning becomes increasingly useful as listening skills improve. It is also important to remember that tuning is not a one-time task. Changes in temperature, humidity, transportation, and string condition can affect pitch at any time.
With regular practice, the process becomes faster and more intuitive. A properly tuned violin gives every player a stronger foundation for producing clear, expressive, and musically accurate sound.
Improve Your Violin Journey with Violin Network
Understanding how to tune a violin is only one part of building a rewarding relationship with the instrument. Whether you are a complete beginner trying to understand basic violin setup, a developing student looking for practical learning guidance, a teacher seeking useful resources, or an experienced musician exploring the wider violin community, having access to focused information can make your journey more productive.
Visit Violin Network at https://violinnetwork.com/ to explore a dedicated platform centered on violin learning, knowledge, resources, and connections. Instead of struggling with scattered information, you can discover content designed around the needs and interests of violin enthusiasts.
If you are currently learning how to tune a violin, improving your practice habits, exploring violin-related guidance, or looking to deepen your understanding of the instrument, Violin Network can be a valuable place to continue your journey. Reliable knowledge and consistent learning can help you make better decisions, avoid common mistakes, and build confidence step by step.
Take the next step toward stronger violin skills and a more informed musical experience. Explore Violin Network today, discover helpful violin-focused resources, and continue developing your knowledge with a platform created for people who share an interest in this remarkable instrument.
Commentaires (0)
🔒 Veuillez vous connecter pour commenter
Veuillez vous connecter pour commenter💭 Pas encore de commentaires. Soyez le premier à commenter !